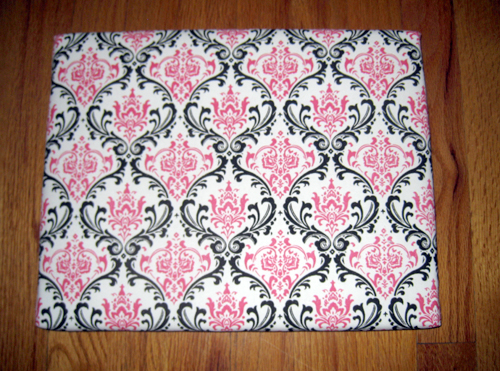
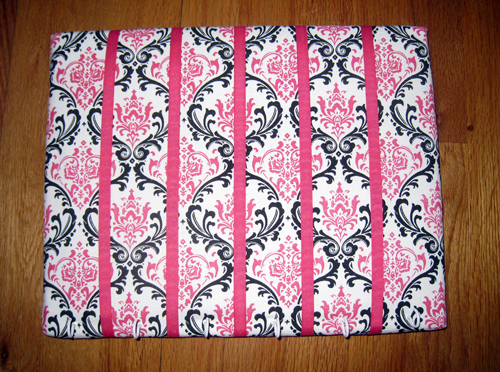
This hair bow holder is a gift I made for my friend’s daughter. I made this for her because I heard the little lady recently got her room painted pink and thought this would be a fun and practical accessory.
 My favorite part is the hooks at the bottom of the board for hanging headbands and ponytail holders.
What You’ll Need To Make This Canvas Hair Bow Holder:
- Stretched Canvas (used 11 in x 14 in board- found it in the Art section of Michael’s)
- Fabric (make sure it’s ironed!)
- Quilt Batting (optional)
- Scissors
- Staple Gun
- Cup Hooks (found in hardware stores – I got mine in Walmart)
- Grosgrain Ribbon
- Scissors
- Fabric Glue (optional)
How To Make Hair Bow Holder:
Here are the main items you’ll need to make this bow holder. The cast of characters:
Step 1: Measure and cut batting, allowing for about 2 extra inches on all sides. Staple the batting down around the frame, while holding the batting taut. Personally, I chose to use batting to add extra padding to the front of the bow holder, but you don’t have to do this. You could also start with step 2.

Step 2: Just like the step above, measure and cut fabric leaving an extra two inches around each side.

Step 3: Cover the canvas in fabric, hold fabric taut, and staple it to the back of the frame. Two pieces of advice: 1.) If you’re using a fabric with a horizontal or vertical pattern, make sure you’ve laid it straight before stapling it to the board. 2.) Be extra careful stapling around corners. Make sure you wrap the corners well!

Here is what the front looks like when fully stapled:

Step 4: Cut ribbons at least 2 inches longer than the length of the board. Evenly space them across the board. Glue or staple the ends of the ribbons down to the back of the board.

Step 5: Half way between the ribbons or edges of the board, screw the cup hooks through the fabric and into the canvas. You should be able to screw the cup hooks in by hand. No special tools required!

Step 6: Admire your work! If you want to hang your new bow holder, you can either stick two thumbtacks into the wall or use extra ribbon and glue/staples to create a hanger (see my tutu hair bow holder instructions.)

Wow! Thanks, this was simple, easy and took less time than I thought. Thanks for the share!
does the fabric tear when you twist the cup hooks into it?
With the fabric I used, it did not tear. The cup hook made a tiny hole which you don’t really see since it twists right into the wood on the frame.
for the hooks, was yours plastic?
The hooks are metal. This made it easier to screw into the wood part on the back of the canvas.
Thanks for sharing. Your instructions made this so easy.
No problem. I hope your bow holder turned out well!
Thanks so much! My hair bow holder is so cute! I’m so excited! I looked at lots of different kinds I could make. Yours was the best, and it was so simple! 🙂
Thanks for the compliment and enjoy your bow holder!
Thanks so much for this tutorial! I just made it and it took less than an hour. The tip to use canvas was key, as I had been trying to use an old frame and the wood was too hard to screw in the cup screws. I just happened to have a canvas laying around so this was perfect! Thank you!!
Easy, right? I originally wanted to use an old frame as well but had no patience/time to drill the cup hooks into it. This is more practical. Enjoy your bow holder!
About how much fabric did you use?
I used 15 inches x 18 inches of fabric for an 11 x 14 canvas. Basically, I added 2 additional inches to each side of the canvas. A little extra fabric doesn’t hurt. Better to have more than less! You can always trim it down in the back.
Awesome, cute, and super easy! Thank you! 😍💃🎀
You’re welcome!
can i use anything else besides a glue gun?
I used a staple gun, but I imagine anything that can hold/tack fabric into place against wood on the back of the canvas would be fine. Also, the batting between the canvas and fabric is optional, so that would be one less material to attach. You might have to test different tacking methods to see what works best. Let me know what you end up doing!
Where did you buy that fabric? It matches exactly to my daughters reading chair and would love to make a matching bow holder!
Hi Phylicia! You can buy this fabric on Amazon: http://www.amazon.com/Premier-Prints-Madison-Black-Fabric/dp/B00FPSAA20/ref=sr_1_2?ie=UTF8&qid=1455372302&sr=8-2&keywords=pink+black+damask+fabric
Thank you! It was well explain! Made mine really easy!
That’s great! Enjoy it!
Hi.
Thank you so much. It was fairly simple and stylish. I used a 16×20 canvas, with batting and a staple gun.
Wanted something to decorate my daughter’s home and organize the bows and headbands. This was perfect!
You’re welcome! Enjoy!